
How to Create Effective Artwork for Banner Pens?
How to Create Effective Artwork for Banner Pens?
Banner pens are unique in that they have an exceptional print area that allows for including even the most detailed and elaborate artwork. These clever promotional items are essentially promotional pens that come with a flyer built in.
The leaflet, which can be branded in full colour on both sides, is rolled inside the barrel and can be pulled out comfortably. Once it's seen and let go off, it rolls itself back into the pen, so the tool can be used to make notes, just like any other writing instrument.
Banner pens we've supplied in the past have included timetables, detailed product guides, calendars, awareness campaigns and good old adverts. Whichever way you would like to use it for your business or organisation, we have a few foolproof tips that will help you create a successful campaign.
Branding Area Explained
Most of our banner pens have a print area of approx. 65 mm by 200 mm. The shorter side is the length of the pen's barrel, while the longer one is the length of the flyer when completely pulled out.
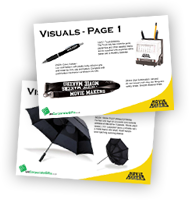
A metal strip attached to the barrel is used to pull the banner out. Once pulled out, the flyer has the pen on one side and the metal strip on the other side.
Most right-handed people will pull out the banner to the right with a natural movement, meaning that the metal handle will be on the right. The banner with the strip on the right is therefore the front of the flyer, making the other side the back.
Some banner pens also offer printing on the pen itself - on the clip or on the barrel.
Designing Your Artwork
Our internal graphics department help clients with artwork layout at no extra cost. We can help distribute the content you provide to us to present it clearly, paying attention to your brand consistency. If you're designing your artwork completely by yourself, keep reading for some great pointers.
Print Area Sections
Even though we see both sides of the banner as uninterrupted print areas, the front does in fact consist of two sections.
The first section - taking up most of the space and connected to the pen is the main banner print area.
The second section - about 18 mm wide and next to the metal handle is the second section. We make this distinction because it can be seen through the transparent body of the pen once rolled in, in addition to being visible when the banner is pulled out.
Because the second section is visible along the pen, we advise that the text and logos within are aligned parallel to the handle. It is good to include your logo and most important contact details in here - as if to mimic the print of any other pen.
Outside of the barrel section of the banner, the rest of it can be designed in either portrait or landscape orientation. As banner pens are often used multiple times as a reference to a piece of information, the flyer can include sizable portions of text - as paragraphs, bullet points or tables.
Banner Pen Artwork Specifications
When including text in your artwork, we advise to keep font size at minimum 6 pt (this depends on the font). Don't forget to add suitable amount of space between lines of text so that it's legible. You might be tempted to include as much text as you can fill in the flyer but it's often best to limit text amount so that it's easy to read. In addition, important text shouldn't be placed closed to the edge than 3 mm.
If you're using coloured background, add 2 mm bleed around the print area to ensure your background prints edge-to-edge.
The file should be saved as EPS or PDF, with all fonts converted to outlines. If you're not sure what this means, we are happy to help you along the way.
Get Free Weekly Email Updates
- Branding and Product Tips
- Case Studies
- New Product Alerts


Talk to Us
»
01204 577 995
info@UKCorporateGifts.co.uk